Standardize Salesforce Contact Information using Cloud Dataprep by Trifacta
Introduction
Accurate contact information is the lifeblood of any CRM. However, there are instances where how the data is represented to end-users is not always optimal for providing consistent Sales Activity. Consistent phone number values are one example where not having the proper format may lead to slower call flow performance, inability to connect with CTI (Computer Telephony Integration), and potentially missed opportunities to connect with Prospects. One example of difficult data management are systems which contain both International and Domestic phone numbers. Within Salesforce, standard US phone numbers typically will format properly, but International Phone is more tricky. What if we could uncover existing Contact information to find Contacts with International Phone numbers and apply the proper format to make the native Salesforce functionality work properly? Let’s go …
In this lesson, our challenge will be to:
- Find Existing Contacts with International Numbers in Salesforce
- Access Dataprep (Trifacta)
- Setup the Salesforce Connector in Trifacta
- Select Contacts to Import into Trifacta
- Setup a Flow to manage Contact Records
- Within a Flow find Contacts with International Phone Numbers
- Reformat the Phone Number
- Run the Job and Download Corrected File
- Reimport the Corrected Contacts back into Salesforce
Prerequisites
- Sign up for Salesforce Developer Edition
- Sign up for Cloud Dataprep by Trifacta
- Sign up for Google Free Tier
Step 1: Find Existing Salesforce Contacts with International Numbers
Here’s an example of existing Contacts in Salesforce with International Numbers. Notice that the Salesforce formatting is treating these London/Italy numbers as US numbers with brackets around the first 3 numbers available.

Step 2: Enable Salesforce Connector in Trifacta
Once inside Trifacta, we will need to connect Salesforce to allow users to access Salesforce data to be used in Flows and Data Wrangling.
Steps
- From the homepage, select the Import Data button

- On the Import Data page, select the New button

- On the Create Connection page, select Salesforce (import only)

- On the Create Connect (Salesforce) page, provide the following
- Server Name = login.salesforce.com
- User Name = your (admin) username
- Password = your (admin) password
- Security Token generated in account = the token of the username provided
- Select Test Connection to verify the connection
- Once done, select Create

Step 3: Import Salesforce Contact data into Trifacta for Analysis
Once the Salesforce Connector has been made active, the connector presents options for accessible data elements within Salesforce. We’ll proceed to find the Contact object to use and make a dataset
Steps
- From the Salesforce Connector, see the available objects
- From the list, select SFORCE to see Standard Objects

- From the SFORCE list, select Contact
- Select the Import button to complete Dataset creation

Step 4: Use the Contact Dataset in a Flow to Wrangle and Analyze data
We will now take the recently created Contact dataset, find the records containing the International Phone Numbers to correct them using a Flow to route the dataset and Recipe to manipulate the data. Let’s get started
Steps:
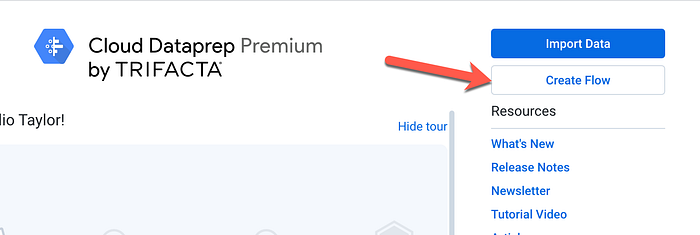
- From the Dataprep home page, select Create Flow
- On the Create Flow prompt, provide Flow Name and Description
- Select the Create button

- On the Flow page, select Add Datasets

- Select the Salesforce: Contact dataset from the previous step

- Once the dataset has been selected, select Add new Recipe to manipulate the data

- Select Edit Recipe to adjust the Contact dataset

- On the Recipe page, view all of the Contact data from Salesforce
- Note the International values with no formatting (highlighted)

- Note: For easier management, since this Dataset will contain all fields on the Contact object, choose to only display the fields you need. ID, NAME, PHONE and hide all others. You can do this using the “eyeball” icon in the lower left-hand corner

- On the Visible columns window, Select the “eyeball” icon to hide fields that aren’t needed and select the [X] when done

- Now we’re presented with a clean dataset to manage
- Start by selecting the Phone data contained in the Phone column, Dataprep will detect the pattern, create a new column, and make a series of suggestions based on the data and which action to take. Choose the “Keep rows” Suggestion matching on what’s been select and select Add

- Once selected, we’re now left with the records which meet our criteria to apply the format

- Select the Next Step button to Transform the Phone Number
Step 4 (Option 1) Use Formula to Transform Phone into International Number
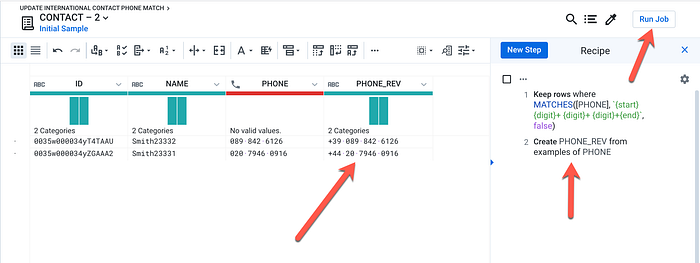
- On Search Transformations, select Create column from examples

- On the Create column from examples page, provide the following
- Column = PHONE
- New Column Name = PHONE_REV
- Select the Pattern (*) Icon to help identify patterns in your data
- On the Preview column, enter what the output should look like
- Note: for the 020 7946 8916 (London) example, we remove the first 0 and prefix +44 International Code
- Note: for the 089 842 6126 (Italy) example, we simply prepend the prefix +39 International Code
- Note: You should notice for larger data sets, Trifacta will identify more patterns and apply to all at the same time

- Once renaming is complete, proceed to Run Job to produce a CSV output
Step 5: Run the Job to produce a CSV Export of Updated Contact data
Within this step, we want to make sure to update the headers in the output so we can have a reference for mapping the data back into Salesforce
Steps
- On the Run Job page, select the Edit button next to the Create-CSV publish action

- On the Edit page, scroll to the right pane and select More options
- Check the “Include headers as first row on creation”
- Select Update

- Confirm that the Settings section, confirm that “with headers” is included
- Select the Run Job button

- Now, you’ll be redirected back to the Flow section to see the status of the running job

- Once done, the Job status will be marked as Complete to signal that it’s ready to download

Step 5: Download the Updated Contact File and Reimport into Salesforce
We’ll now download the file from Dataprep to our desktop, clean it up and reimport back into Salesforce. Here are the steps
Steps:
- On the Job page, scroll to the Publish section and select View All
- On the File page, select the hyperlink to download


- Once on the desktop, open the CSV file to view the output

- Proceed to clean up the file to only include the desired columns for import

- Navigate to Salesforce as a System Administrator

- Scroll down to the Launch Wizard
- On the Launch Wizard page, provide the following:
- What kind of data are you importing: Standard objects > Accounts and Contacts
- What do you want to do? Update existing records. Match Contact/Account by Salesforce.com ID.
- Where is your data loaded? Upload the CSV containing the Updated Contacts

- On the Edit Field Mapping, proceed to update the Phone field

- Select the Start Import button
- Once complete, view an existing Contact to see updated Phone

What’s Next?
Now that contact data is more accurate, take a step further. Find more opportunities to standardize existing data throughout Salesforce, your end-users will thank you …
- Join the Trifacta Community
- Watch the Latest Trifacta Video Walkthrough
- Learn more Trifacta Advanced Data Quality tips!
- Learn more Salesforce using Trailhead